 Rapid growth in mobile applications requires platforms that provide independency to develop applications for multiple mobile operating systems with minimum efforts. In this article, I will explain brief information about CocoaPods and step by step instructions that will help you to install this application level dependency manager into your xCode project.
What is CocoaPods
CocoaPods is developed by Eloy Durán and Fabio Pelosin and many other contributors who released the first version of this application level dependency manager for Objective C programming language on 1st September 2011. Before start teaching how to install CocoaPods, I recommend reading detailed information here.
Steps to Install CocoaPods to xCode
#Step 1
Install command line tool into your MAC operating system
 After successfully completion of installation process, goto spotlight and locate terminal and click on it.

#Step 2
Type below command into terminal
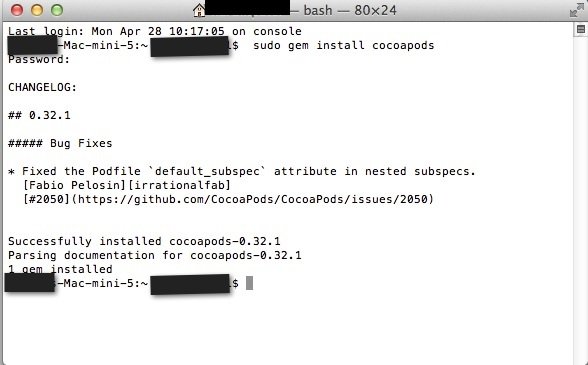
$ sudo gem install cocoapods
Once you enter this command line instruction into your terminal, it will ask password. Use your MAC system password.
If you have already installed CocoaPods into your system, you will see below output.
 If you are facing any errors or issue while installing CocoaPods, setting up CocoaPods master repo as shown in below screenshot.
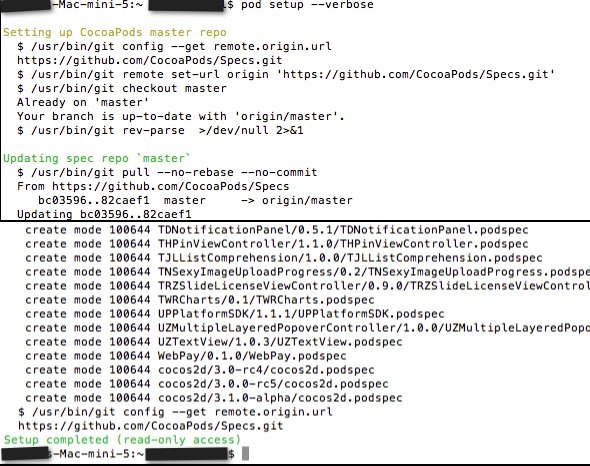 Wait for few minutes while it install all specs fro github to your system and end with below line.
setup completed(read-only access)
Once it is done, Goto Step2 !
#Step 3
Now we are going to create testingPodInstall Demo that we are installing pods in to this project
- Create project from Xcode—>new—> project
 Once you created new project, it will prompt to next screen that will ask you to choose a template for your new project. Here you can choose one based on your requirement. I will go with Single view application for this demo.
 Now click on next and you will go to another screen shown below.
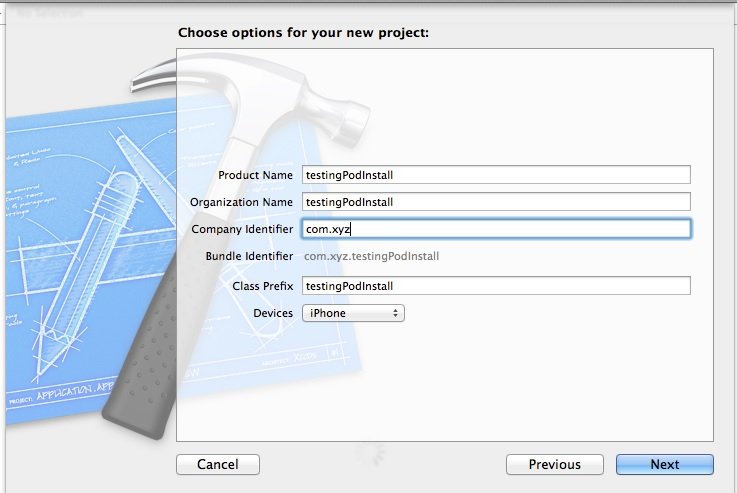 Insert requested information and save at your preferred location. For this demo, i will save it at my Desktop.
#Step 4
- Now open terminal
- And set path of you the project that you recently created using step 3 by following command shown in below screenshot
 after successfully execution of given commands, you will be in folder where your project is saved.
mymac-Macmini-5:testingPodInstall mymac$
- now create a podfile in to your project folder using $touch podfile that will crate one .txt file in to your project folder as shown in below screenshot.

- Open this file and set your platform version or pod command in to this .txt file and save. Here is the details i used.
 platform :ios, '7.0' // this is a platform

declaration in to this created pod file

pod 'AFNetworking', '~> 2.2' // this is library that you

want to add in to your project using pods

pod 'SDWebImage', '~> 3.6'
Once it is done, the txt file will look like below screenshot. Don’t forget to SAVE this file.

Now use below command to install this pod file into your project
$ pod install
Wait for few minute while this command analyzing dependencies and downloading dependencies. Once the process is done, your terminal will look like below screenshot.
 Now check your project folder !
 After this process you will find, testingPodInstall.workspace or pod file.lock to working with. Now you can work on testingPodInstall.workspace file instead of testingPodInstall.xcodeproj
After installation of pod file, the workspace project in xcode will look like:
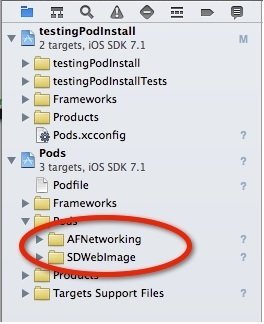 As you can see in screenshot, there will be two AFNetworking and SDWebimage folders installed in to your project and its done. Now you can use these two library anywhere in your application development process.
Here is the link to find many pod files like this: http://cocoapods.org/?q=AFn. You can also visit official CocoaPods website to search other useful resources here: http://cocoapods.org

Great tutorial ….!!!!!
Xcode not xCode
🙂